Adding Data An Access database is not a file in the same sense as a Microsoft Office Word document or a Microsoft Office PowerPoint are. Instead, an Access database is a collection of objects like tables, forms, reports, queries etc. that must work together for a database to function properly. We have now created two tables with all of the fields and field properties necessary in our database. To view, change, insert, or delete data in a table within Access, you can use the table’s Datasheet View. A datasheet is a simple way to look at your data in rows and columns without any special formatting. Whenever you create a new web table, Access automatically creates two views that you can start using immediately for data entry. A table open in Datasheet View resembles an Excel worksheet, and you can type or paste data into one or more fields. You do not need to explicitly save your data. Access commits your changes to the table when you move the cursor to a new field in the same row, or whe...
Use Templates in Word 2010
Microsoft Word template is a collection of styles which defines paragraph styles for regular text paragraphs, a title, and different levels of headings. You can use any of the already existing templates for your word document or you can design a template which can be used for your all the company documents.
Using Existing Template:
Following are the simple steps to use an already existing template for your newly created word document. A template is selected at the time when you create a new blank document.
Step (1): To start a new document, Click the File tab and then click New option which will display Available Templates to be selected.
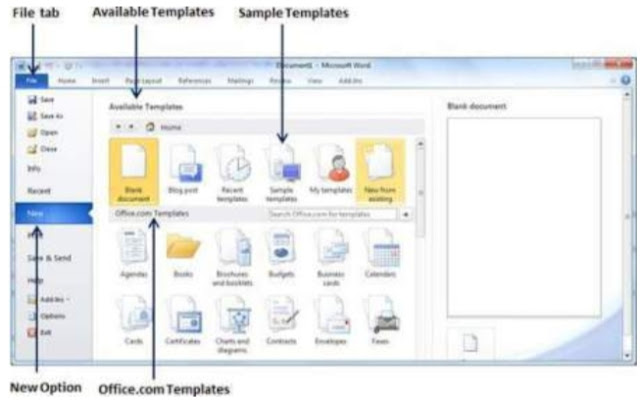
Step (2): Microsoft Word provides a list of templates arranged under Sample Templates or you can download hundreds of templates from office.com which are arranged in different categories. We will use Sample Templates for our document, so let us click over Sample Templates which will display a gallery of templates. You can try to use office.com option to select a template for your requirement.

Step (3): You can browse a list of available templates and finally select one of them for your document by double clicking over the template. I select Equity Report template for my report purpose. While selecting your template for a document, you would have to select Document Option available in the third column. This opens your document with predefined setting which you can modify document title, author name, heading etc as per your document requirement.

Create New Template:
You can create a fresh new template based on your requirement or you can modify an existing template and save it for later use as a template. A Microsoft Word template file has an extension of .dotx. Following are the steps to create a new template.
Step (1): To create a new template using an existing template, Click the File tab and then click New option which will display Available Templates to be selected. Select any of the available template and open it with Template Option turned on.

Step (2): Now you can modify opened template as per your requirements and once you are done, you are save this template with .dotx extension which is standard extension for Microsoft Word Templates.

You can create a template from a new document as well. Click the File button, and click New option to open a new document. Under Available Templates, double click Blank Document to create a new document template. Save the template with a unique name and .dotx extension.
You can save created template anywhere you lick and whenever you like to use this template, just double click over the template file and it will open a new template based document for you.
The beginner to advance and start up step-2
Comments
Post a Comment