Adding Data An Access database is not a file in the same sense as a Microsoft Office Word document or a Microsoft Office PowerPoint are. Instead, an Access database is a collection of objects like tables, forms, reports, queries etc. that must work together for a database to function properly. We have now created two tables with all of the fields and field properties necessary in our database. To view, change, insert, or delete data in a table within Access, you can use the table’s Datasheet View. A datasheet is a simple way to look at your data in rows and columns without any special formatting. Whenever you create a new web table, Access automatically creates two views that you can start using immediately for data entry. A table open in Datasheet View resembles an Excel worksheet, and you can type or paste data into one or more fields. You do not need to explicitly save your data. Access commits your changes to the table when you move the cursor to a new field in the same row, or whe...
Adjust Page Margins in Word 2010
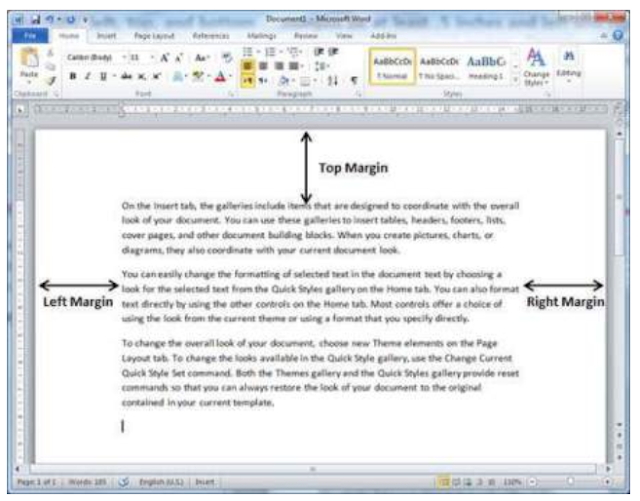
Margins are the space between the edge of the paper and the text. You can adjust the right, left, top, and bottom margins of your document. By default, Word sets all margins left, right, top, and bottom to 1 inch.
Below, I have shown top, left and right margins, if you will type complete page, word will leave 1 inch bottom margin as well.

Adjust Margins:
Following are the simple steps which will be used to set margins for an opened document.
Step (1): Open the document whose margins you want to set. If you want the margins to apply only to a selected part of a document, select that part now.
Step (2): Click the Page Layout tab, and click Margins button in the Page Setup group. This will display a list of options to be selected but you have to click Custom Margins option available at the bottom.
You can also select any of the predefined margins from the list, but using custom margins option you will have more control on all the settings.
Step (3): You will have to display a Page Dialog Box as shown below where you can set top, left, right and bottom margins under the Margins tab. Select Apply to: option to apply the margin on selected text or complete document.
Step (4): If you are going to bind the document and want to add an extra amount of space on one edge for the binding, enter that amount in the Gutter text box, and select the side the gutter is on with the Gutter Position drop-down list. After setting all the desired values for all the margins, click OK button to apply the margins.


Comments
Post a Comment